Maybe I’m a bit late to the game on this one, but I just discovered PwnFox and it’s probably one of my favorite tools yet.
So what is PwnFox? To put it simply, it’s a BurpPro extension that works with Firefox. It accomplishes two things:
- Helps containerize up to 8 (yes that’s right… 8!) different sessions within one browser
- Organizes all your proxied traffic in Burp BY COLOR!
I’ll get to #2 in a second.
I’m a sucker for manual exploitation. Not because I don’t believe in automation or any of that (believe me, I do)… but I like to have granular control over what’s going on sometimes. This is a great tool for just that.
Whether you use Firefox or the built-in Chromium browser within Burp, I’m sure it’s been at least a few times where you’ve noticed that you have your browser, and then you can also open a new incognito window and have a different session.
Usually that’s where it stops.
Even if you open another incognito browser, chances are that it will pull/share cookies from the other incognito browser (annoying, yes).
Enter PwnFox:
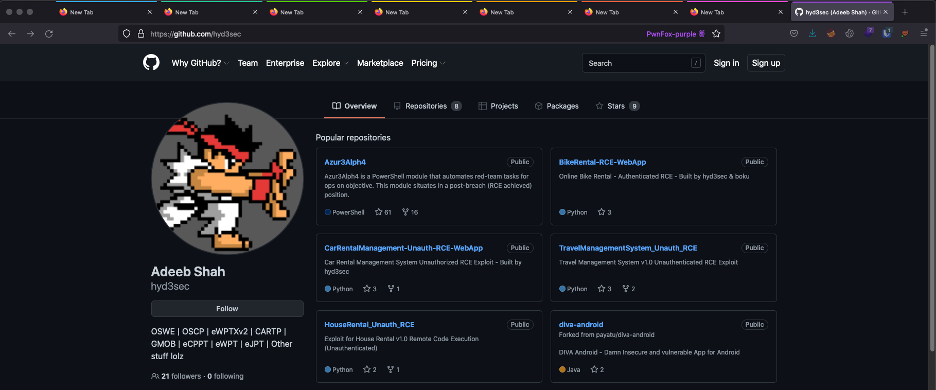
Look at how beautiful that is. Notice the different colors at the top of each tab. Everything’s organized in one window, and each “color” tab has its own containerized session/cookies.
And when you navigate in each tab and have your traffic proxied in Burp, it’s color-coded for you!
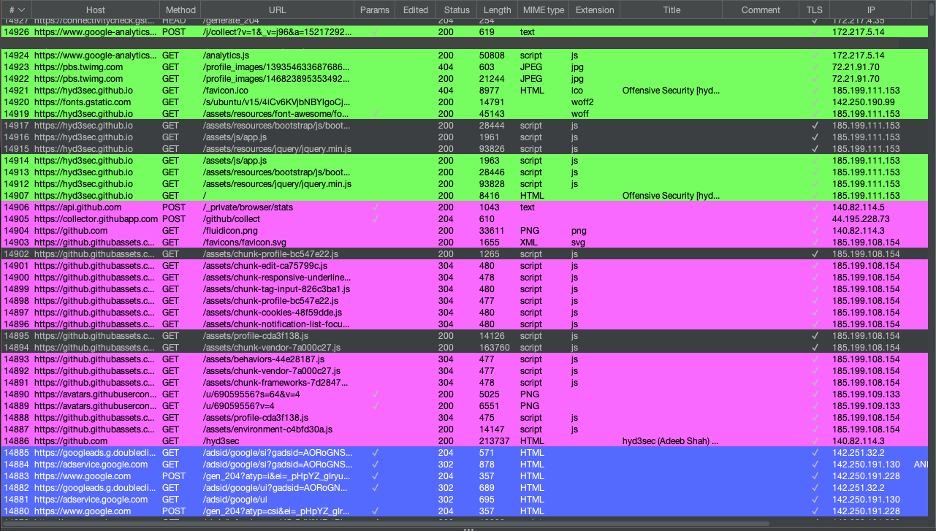
So no more going through each request to see which request belongs to what session. Being able to identify the tab/correlated session is huge!
This allows you to send a request to repeater and hot-swap cookies much easier… so yes, finding IDORs has become 10x more efficient.
Not to mention, if you’re testing a webapp, now you can test more than 2 sessions/roles at a time!
Sold on it yet? Ok cool. Here’s the set-up:
-
Head to https://addons.mozilla.org/en-US/firefox/addon/pwnfox/ and download the extension for Firefox and install it.
-
Now head to https://github.com/yeswehack/PwnFox/releases and download the PwnFox.jar file.
-
In Burp, head to Extender and import the PwnFox.jar file.
-
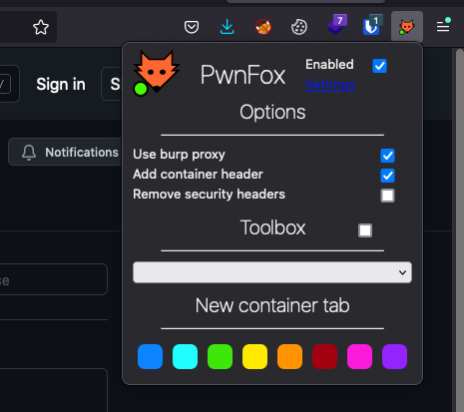
Now, in Firefox, turn the proxy on (via the PwnFox icon) and click any of the container “colors”:
And you’re done! You should be able to see the color-coded traffic in your Burp proxy history!
Curious how it works?
The container actually adds an “X-PwnFox-Color” header to each request… this is how Burp knows what color to highlight each request. Simple, yet brilliant.
A few bugs I’ve noticed:
- You may need to restart Firefox and Burp in order for it to work properly
- If you change the container “name”, this may break the colors showing up in Burp. Just leave the default names as is (ex. PwnFox-blue).
There are other features I still need to explore (such as that Toolbox feature) but save that for another day.
Shout outs:
- @BitK for creating PwnFox
- Cesar for introducing this awesome tool to me
